The Pop-up Book of Sex
Illustrations by Balris Rubess
Pop-ups by Kees Moerbeek
Produced by Melcher Media
2006
| papernoodle |
|
|
Hope everybody had a wonderful Christmas! It was really nice to see family and friends. I also got lots of presents, and..... look what I got! I'm not showing you what's inside, but I'll say that I'm very happy to have this book. I really appreciate the honest and diligently executed mechanisms. It'll put smile on your face. Very inspiring in so many ways. You're the best, Jeff!
The Pop-up Book of Sex Illustrations by Balris Rubess Pop-ups by Kees Moerbeek Produced by Melcher Media 2006
4 Comments
Have a happy holiday!
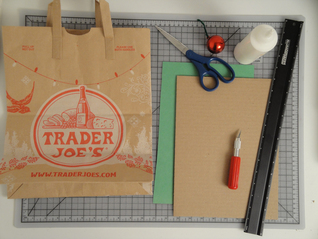 You will need
I found a couple of awesome awesome paper sculpture illustrated books at a Half Price Books years and years ago. The pictures just blew my mind, and told myself to look the artist up, but never did until a few months ago. I was very saddened by what I have found out about him. This year is the 10th year since he passed away. I felt shocked. Not only his works, but also the journey he took as an artist in 49 years of his life is truly inspiring and intriguing. Here's a good reading about him, but basically, he was very into comic books early on, became a clown when he was an young adult, ran a shadow puppet theater after he got married, and then became a paper illustrator and an author. You can pretty much see all his life experiences reflected in his works: humor, terrific story telling, playfulness, drama, mastery in compositions, color, animating the characters and cutting paper. I'd like to celebrate and share his exquisite paper art before this year ends. Click the images to see them bigger. I'm back to my paper sculpture how-to book project. It's been roughly a year and a half since I started working on this project with the GMC publications(UK). I didn't imagine it would be taking this long, but it has. This project has been not just work, but quite an event in my life. This event taught me many things, and changed me as a person. Hopefully, I'm a little bit better person now.
Due to too much work load on my first editor, two new editors are assigned to this book, and I've been doing a lot of catching up with them. I like these fresh eyes, and the book is only getting better and better. There's not much I can share with you at the moment, but it's getting there. On Monday, I moved the pop-ups to the play area in the Center for Discovery. I put the pop-ups on toddler's eye level, and got rid of the stools. Starting Tuesday, I continued my observation in this new location. Because of Thanksgiving Day, it was a little quiet week. The children in the play area were mostly babies and toddlers. There are plenty of toys to play with. They roamed around here freely with their caregiver's supervision. The caregivers were encouraged to introduce their children to my pop-ups. The kids' interaction time with the pop-ups was a lot longer than when the pop-ups were displayed on the first location. Quite a few kids kept coming back over and over. As I expected, I witnessed some rough handling, but no one was determined to destroy the pop-ups as I feared. What surprised me was the condition of the pop-ups. The pop-ups are in pristine condition after handled by almost 100 children. Last 2 weeks has been such an incredible experience for me. I observed almost 100 children's interactions with the pop-ups for about total of 15 hours. I feel very lucky and grateful to be given the freedom by the library to do my research just the way I wanted. I gained so much confidence, positive feedback, and supports. It started as my personal project, but as a very satisfying result of the test, the Center for Discovery and I discussed on the possibilities of my soft pop-up sculptures, and working together to set my personal goal as well as theirs. My next step will be doing more research on resources, and start doodling new soft pop-up sculpture designs.
This is the location of the display wall we picked in the Center for Discovery. After storytime, people pass by here and the castle, and go to the play area, which is seen on the far right side in this picture. On Monday, I installed the pop-ups. From Tuesday, I started observation. I realized that most of parents carry so many things on them that they couldn't hold their toddlers. Also, even when they were able to hold their kids, they had a difficulty holding them long enough. Most infants were in their strollers sleeping. The ways the kids handled the pop-ups were very acceptable, so I decided to lower the pop-ups. I reinstalled the pop-ups to lower level on Wednesday. I continued my observations on Thursday and Saturday. I also, started filming the interactions. So far, my total observation time is about 8 hours. I was there from when the people started coming out of the storytime room. A little over 60 children interacted with the pop-ups. The ages were mostly 2-5 years old. There were a few kids frequently revisiting the display. There are no advertisement or signs about the display. There were some verbal directing once in a while to some parents to encourage their children to open the pop-ups, but not a whole lot. Without directing them, some people noticed, and some didn't. It was interesting to see many children noticed the stools first, and then tried to find out what's up there, and then got curious about the pop-ups. Most kids spent a few seconds on each, total of no more than a minute. The parents were in hurry. My pop-ups are holding up very nicely. I have more confidence about the durability of the pop-ups and the way the children interact with them now. This week, I'm going to relocate the pop-ups to the play area. In this area, the kids play hard with toys. The parents less supervise their kids here. I'm going to mount the pop-ups much lower, and remove the stools, so that the toddlers can have easy access.
I have a great passion for pop-ups. I have always wanted to have an interactive public installation with pop-ups, but the durability was a big challenge. I came up with an idea of making the pop-ups out of felt and fabric, and made some pieces years ago, but never had a chance to test them out in public. A few weeks ago, I finally contacted Center for Discovery in Columbus main library. Center for Discovery is the children's area in the main branch of the Columbus Metropolitan Library. It is one of the greatest places to be for children in Columbus, and it has steady traffic. I've got permission from the library to temporarily install the pop-ups and observe children's interactions with them. Last Friday was my first meeting with the staff . Every single person I've met there was incredibly nice, and very enthusiastic about my idea. I wasn't sure on many things before, but brilliant ideas were pouring in from everyone. We picked a wall spot to display. We decided to put them up high, so the caregivers have to lift their infants and toddlers. We think the children will surely be supervised that way. For small children, we are thinking to put a stool below each piece, so that they can independently access the pop-ups. I'm hoping that small children are a little easier to reason with than babies. Another idea we came up with was to decorate the wall to create a context for the pop-ups. Since they are windows, I had an idea of making the wall as a room. I'm also going to put a little sign under each pop-up, saying "please be gentle." I'm going to be working on this project for at least 7 days starting this week. I'm planning to observe the children's behaviors
on that installation, how many interactions and how long on each, and of course the condition of the pop-ups. I was so nervous at first, and then got too excited at the end, I completely forgot to take pictures of the area,or the meeting. Hopefully, I'll have some good photos to share with you next time. I finally received 3 copies of "GRIMM TALES for YOUNG and OLD" I ordered from Amazon UK, and have been reading it. I was delightfully surprised that the cover has nothing but my artwork, no additional fonts or logo or what so ever. The books came with pretty red book markers which all were placed on 'Little Red Riding Hood' story. I'm about half way now, and the book is incredibly easy to read. I read the stories to my 8 year old son in his bed time. The author's writing really makes me feel like I'm telling a story rather than reading a book. There are a few spots here and there I skip for my son just because I need to do some explaining, and I'm not ready yet. Other than that he's been enjoying the stories very much. I have read other translated version of Grimm Tales, but Philip Pullman's version makes more sense while still keeping all the silliness, raw brutality, magic and humor, and therefore I can picture better in my head. It makes me wanna make a paper illustration for every page. This version is to be released in US soon, but it won't be the same cover I did.
Halloween is just around the corner! Here's a fun project for you. Try this, and send me a picture. Show me how yours turned out. I will post it on my blog.
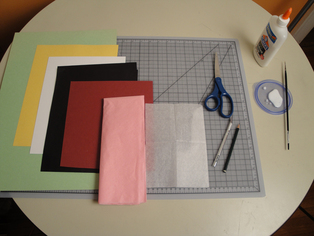 You will need
Wow! I finally managed to clean up my studio after working on my how-to book for so many months. I really didn't think it would be possible to have my clean studio back. I'm so happy now. 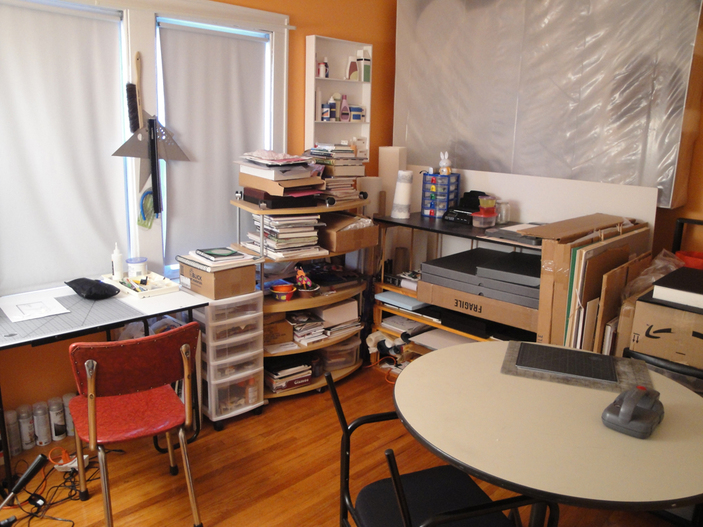 My windows are pretty much covered all the time because UV rays are harmful to paper. My studio is never too humid or too dry. We don't have pets anymore, but even when we did, pets were never allowed in the studio. It's a big no no for me. I have work tables and chairs, many shelves and storage, piles of books, art works, frames, a paper trimmer, a mat cutter, a handheld vacuum cleaner, a dry mop, and of course lots and lots of paper. 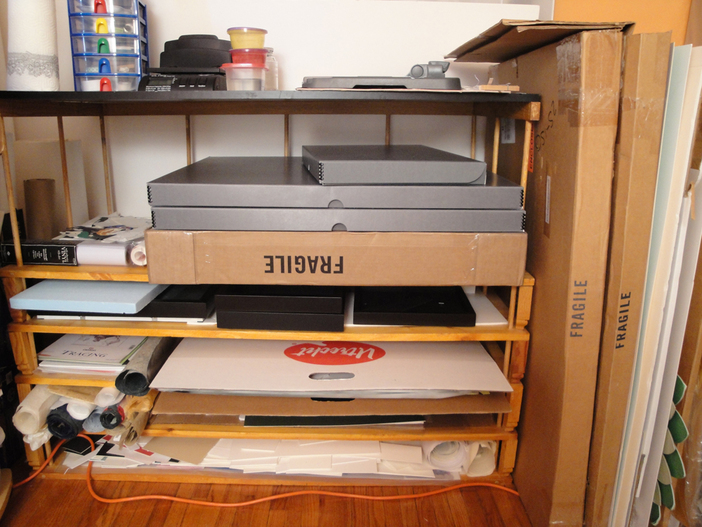 My sweet dear father-in-law made these wooden shelves for me like 10 years ago. I separate acid free paper and non acid free paper. I store my acid free paper in archival storage boxes(you see those grey boxes?). I have a box for white papers, and a box for color papers. I also divide papers to big, medium and small sizes, and store them separately. 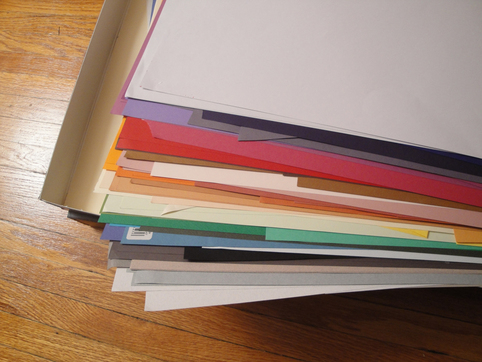 I sort papers with similar hues. 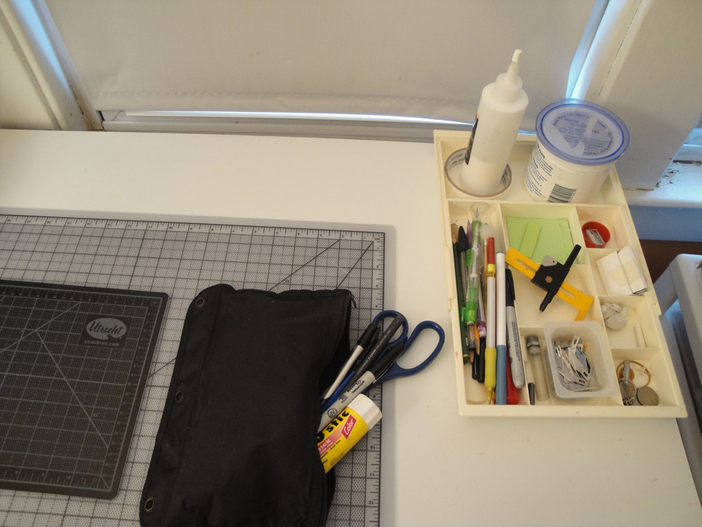 On my work table, I have many cutting mats in different sizes. I have a desk organizer. I also have a tool bag, so that I can carry my tools to some place else. 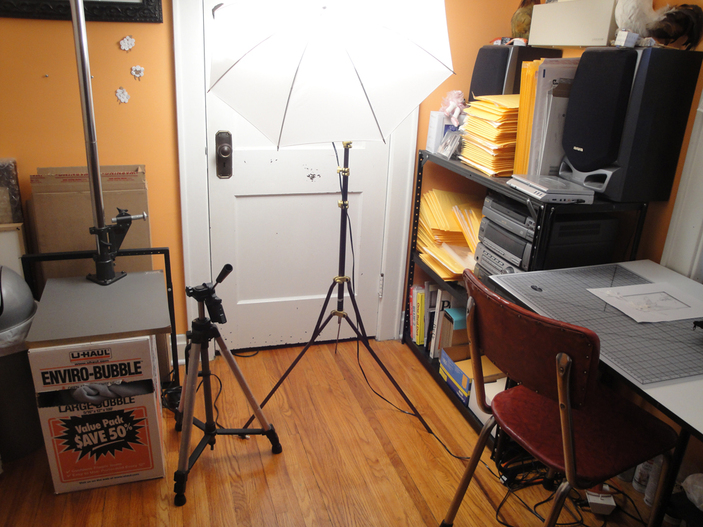 On the other side of my studio, I have a closet full of more stuff, photo equipment, shipping materials, and files. I even have an entertainment system. I'm so lucky to have my own space to do what I love to do. If you would like to try paper craft, you wouldn't need a studio like mine. A dining table, a cutting mat, a small tool bag, and a small paper storage can give you a good start. |
AuthorCheong-ah Hwnag Archives
December 2012
Categories
All
|
||||||||||||