Have a happy holiday!
| charlie_browns_christmas_tree.pdf |
You will need
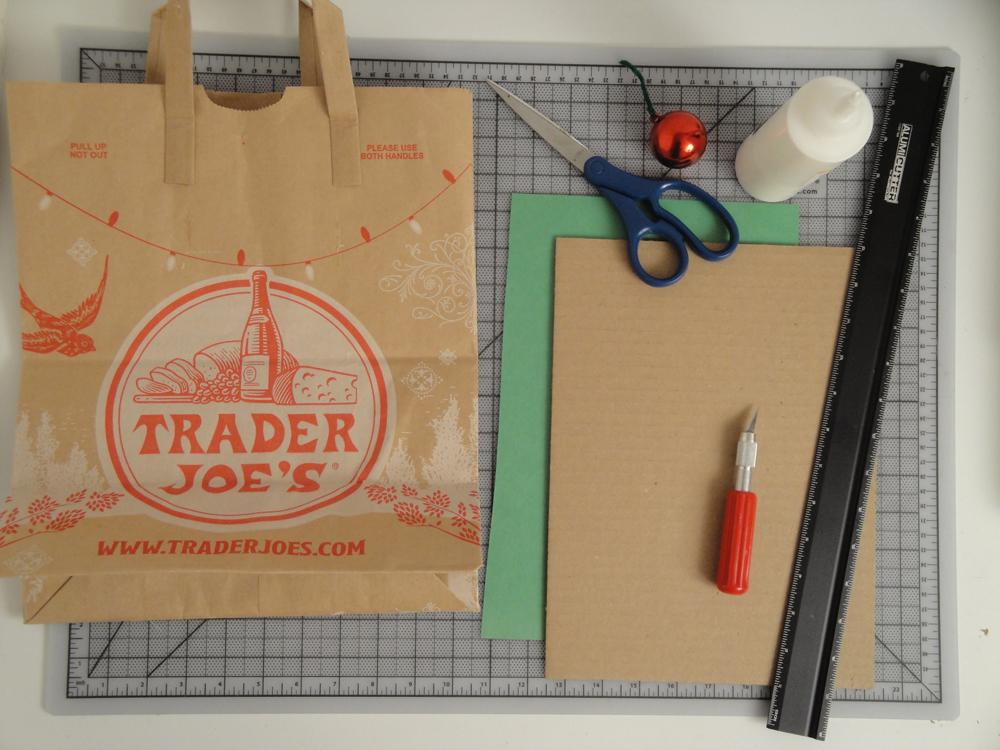
- 1 x paper grocery bag - print is okay
- 1 x green paper
- 1 x cardboard, about 8 x 10in (20 x 25cm)
- Cutting mat
- Scissors
- Knife
- Metal ruler
- Glue
- 1 x Christmas ornament
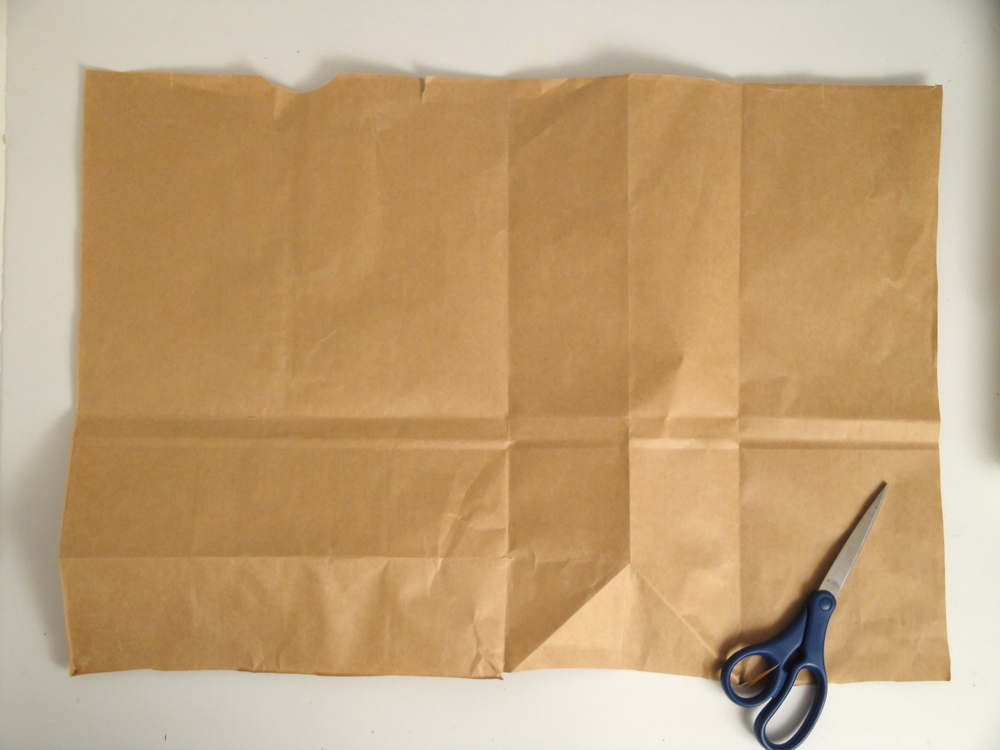 1. Cut the paper bag, so that you have a big flat sheet. | 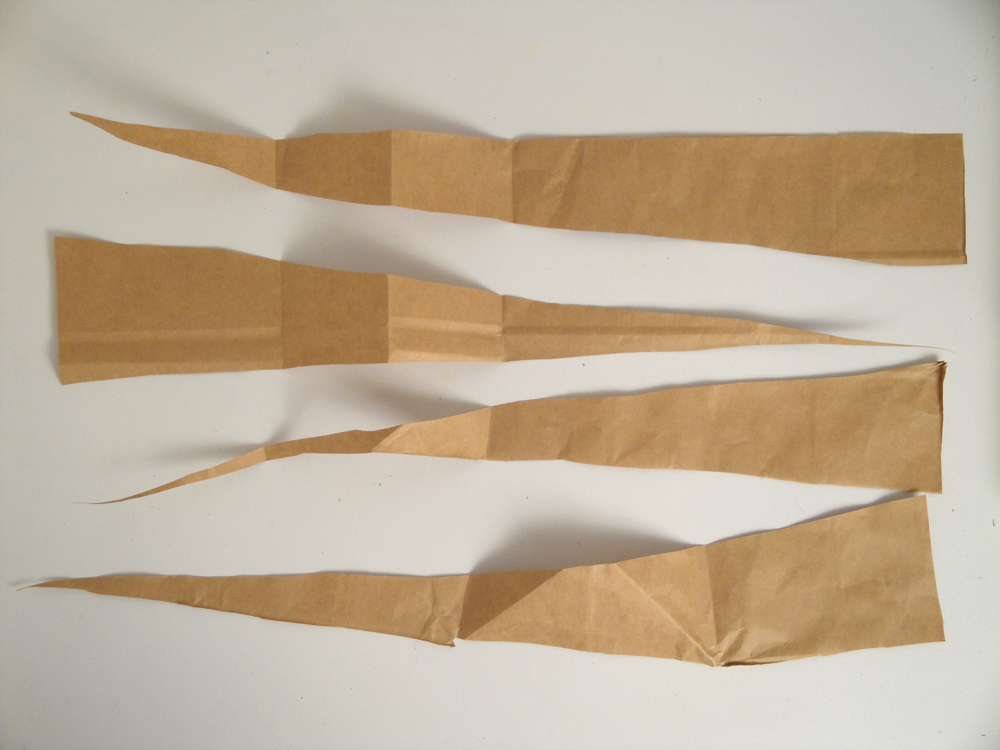 2. Roughly cut triangles that are about 20-24 inches (50 x 60cm) long, and 2-4 inch (5 x 10cm) wide on the bottom with scissors as many as you need. |
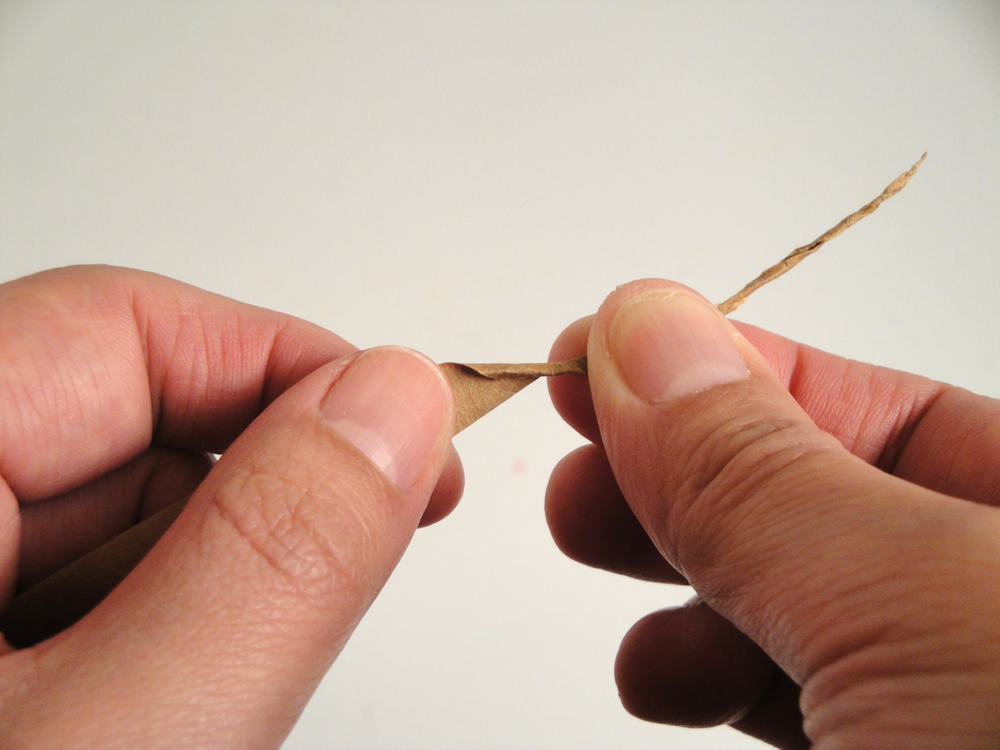 3. Start rolling and twisting tightly in a winding direction about 1/3 of the triangle from the tip to make a branch. Repeat on the rest of your triangles. If you don't want to see the print on the branch, make sure the printed side gets rolled in. | 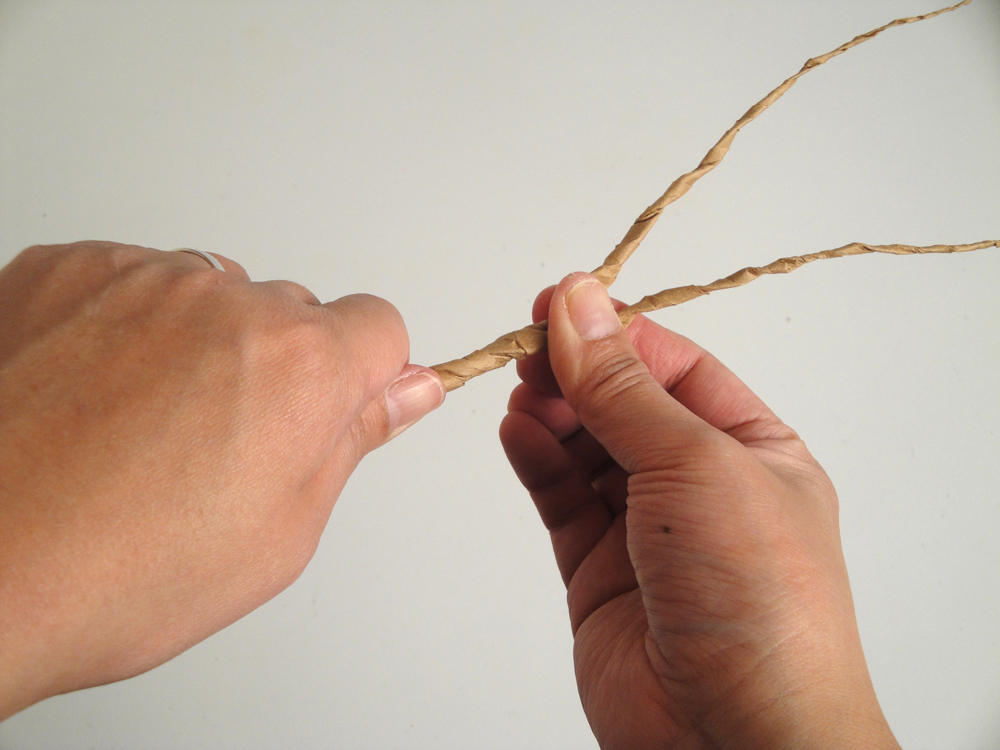 4. Take two branches, and hold the ends of the twisted parts together, and start twisting the two pieces about a couple of inches more. |
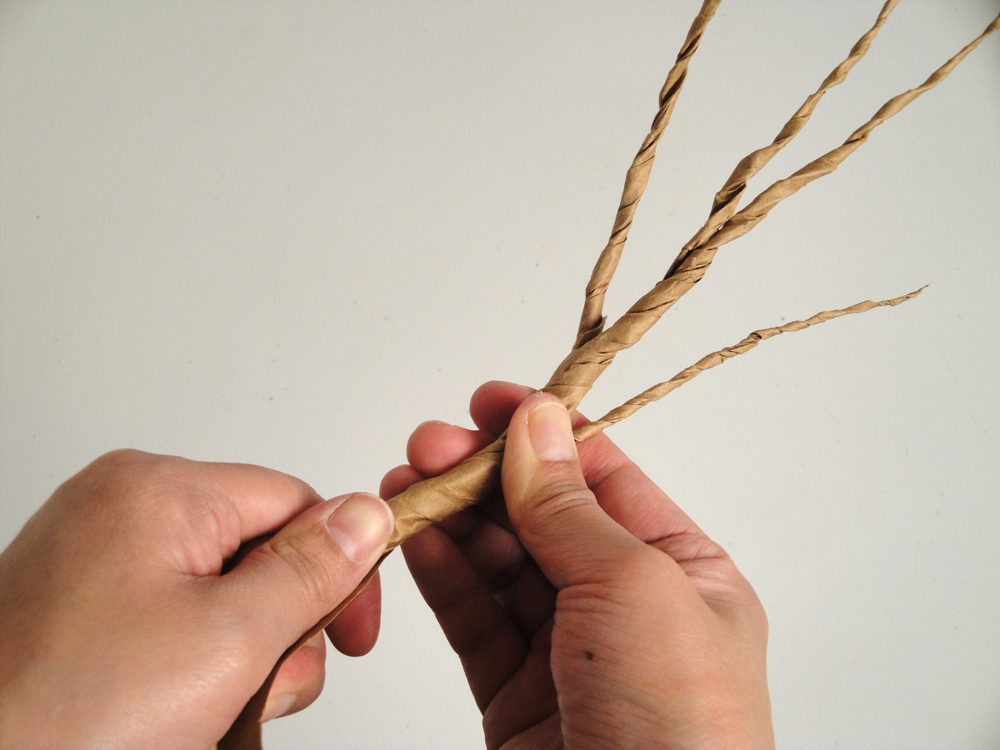 5. Add more twisted triangles, one after another, and keep rolling and twisting them altogether to make a tree. | 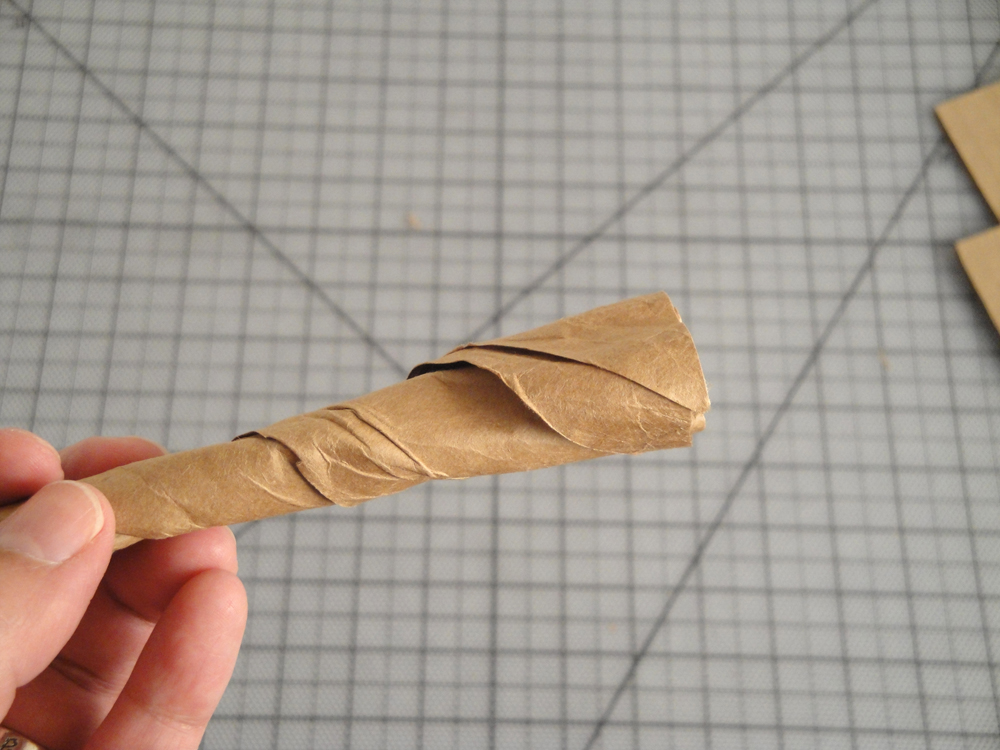 6. Cut the bottom clean and flat. |
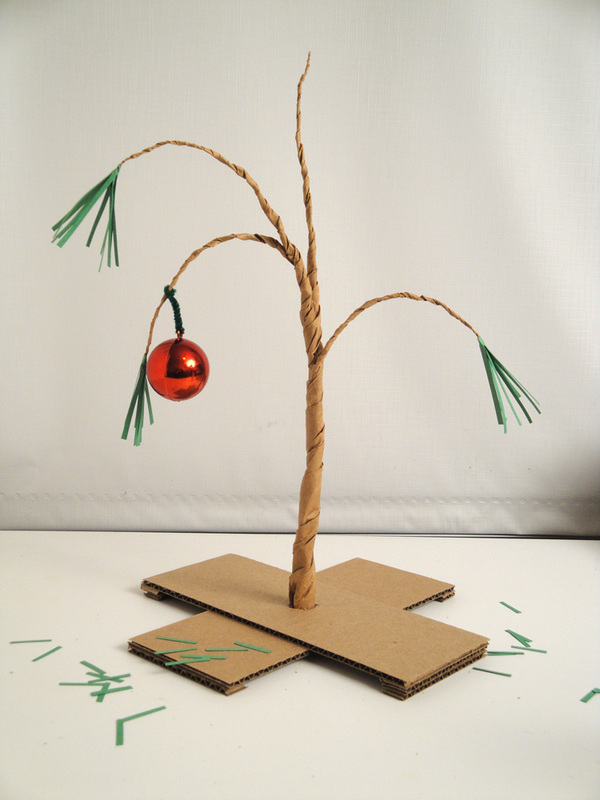
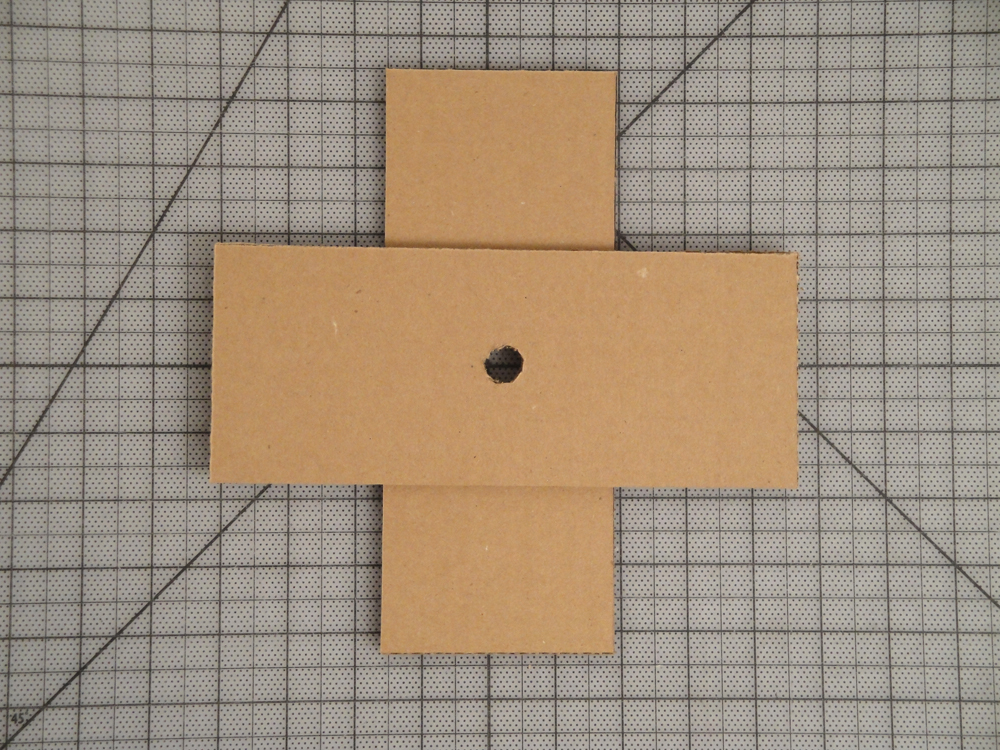 7. Using a knife and a metal ruler, cut 2 pieces of cardboard 3.5 x 9in (9 x 23cm) to make a base, and in the middle, make a hole as big as the width of your branch. Glue them together as shown in the picture. | 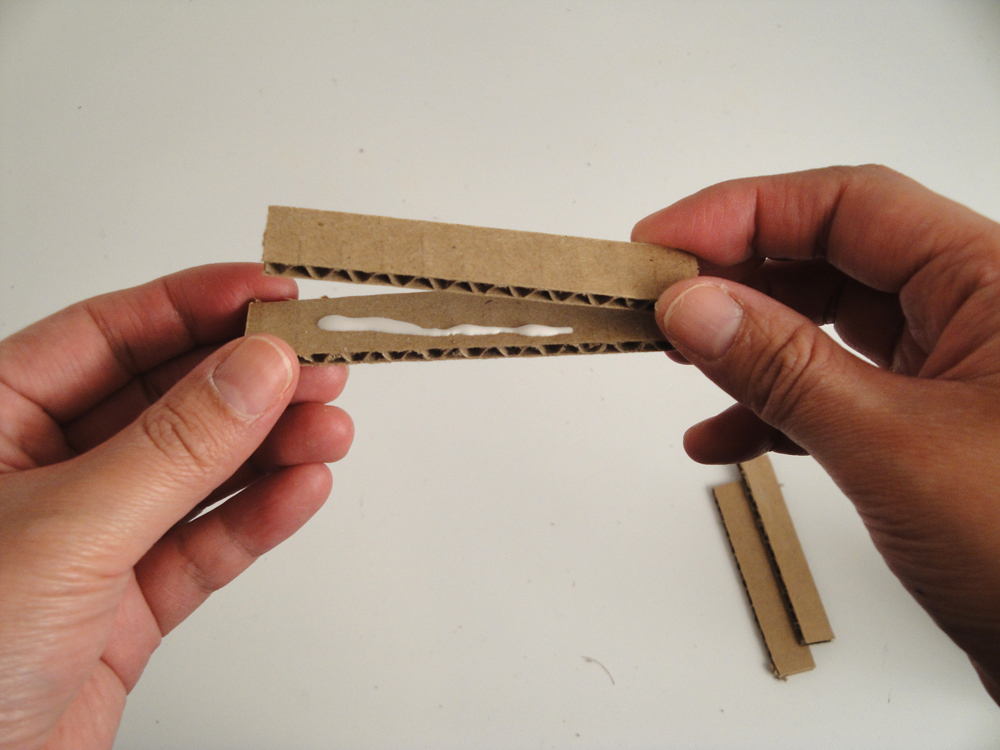 8. Cut 6 small pieces out of cardboard, and stack 2 pieces. Put them aside, and make another stack of 2 pieces. |
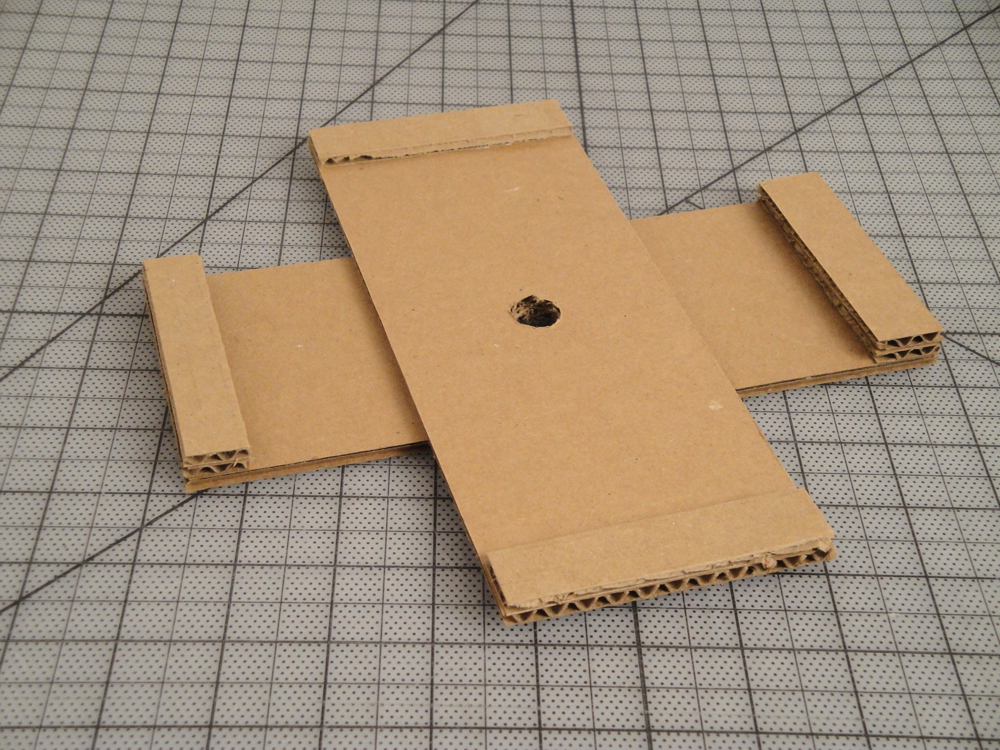 9. Glue the little stacks on both ends of the base piece that is on the bottom. Glue the rest of the little pieces on both ends of the base piece that is on top. | 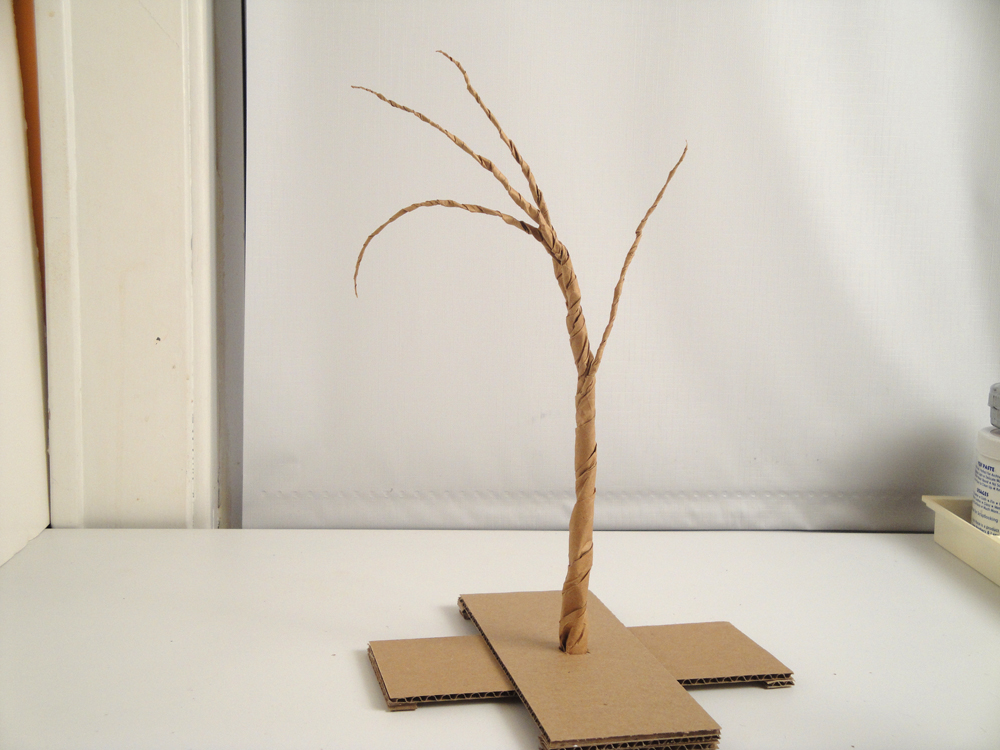 10. Flip the base, and put the tree in the hole. |
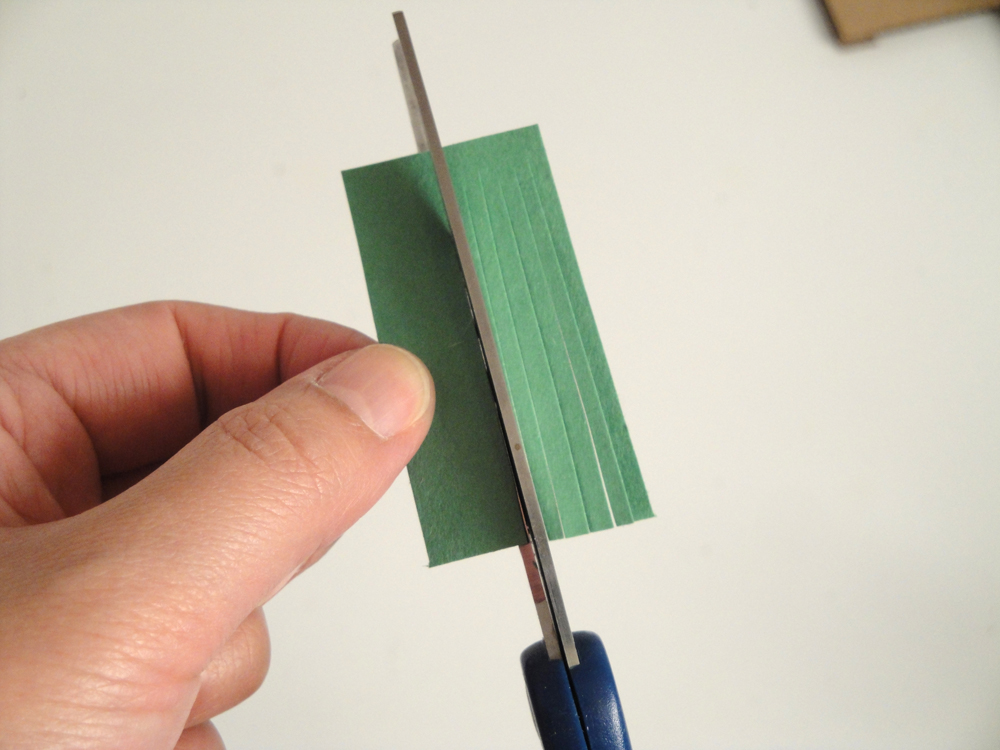 11. Cut about 2 inch (5cm) long and 1 inch (2.5cm) wide piece out of green paper. Make cuts along the longer side to make pine needles, leaving the other edge uncut. | 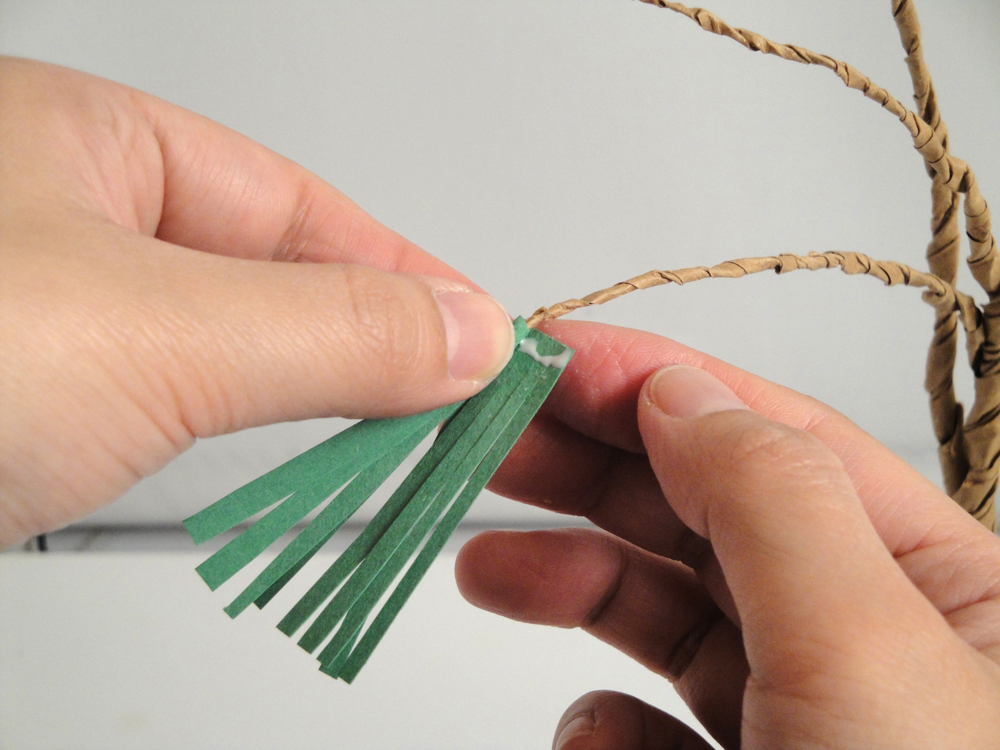 12. Put some glue on the uncut edge, and attach one corner to the tip of the branch. Tightly wrap the branch with the green paper in a little bit winding direction. |
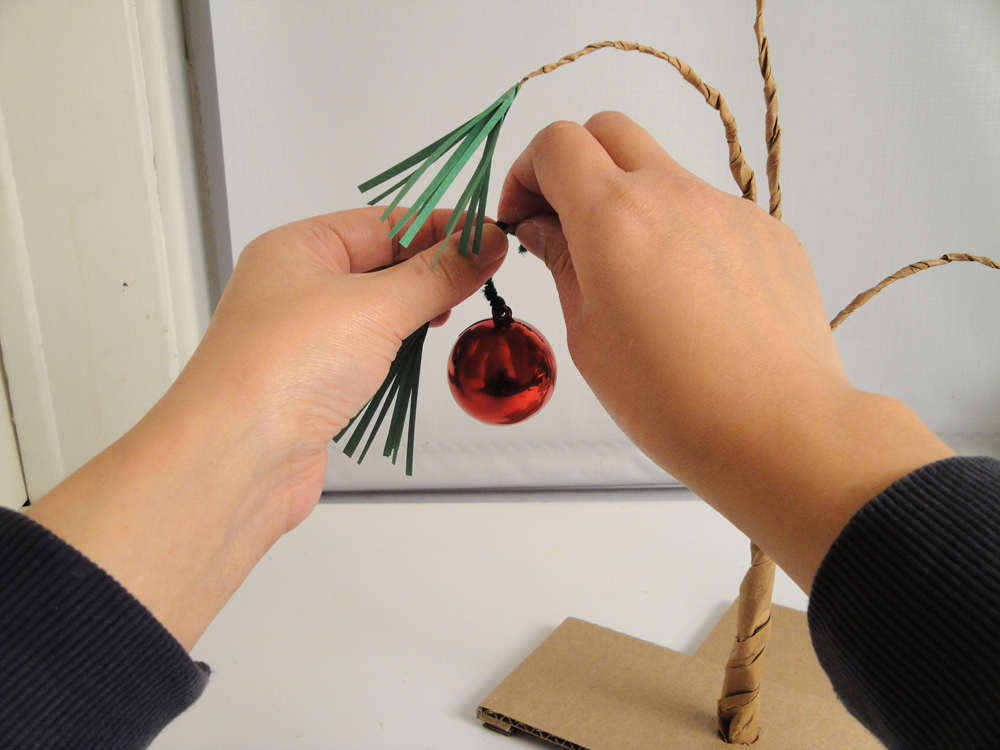 13. Decorate the tree with a Christmas ornament. | 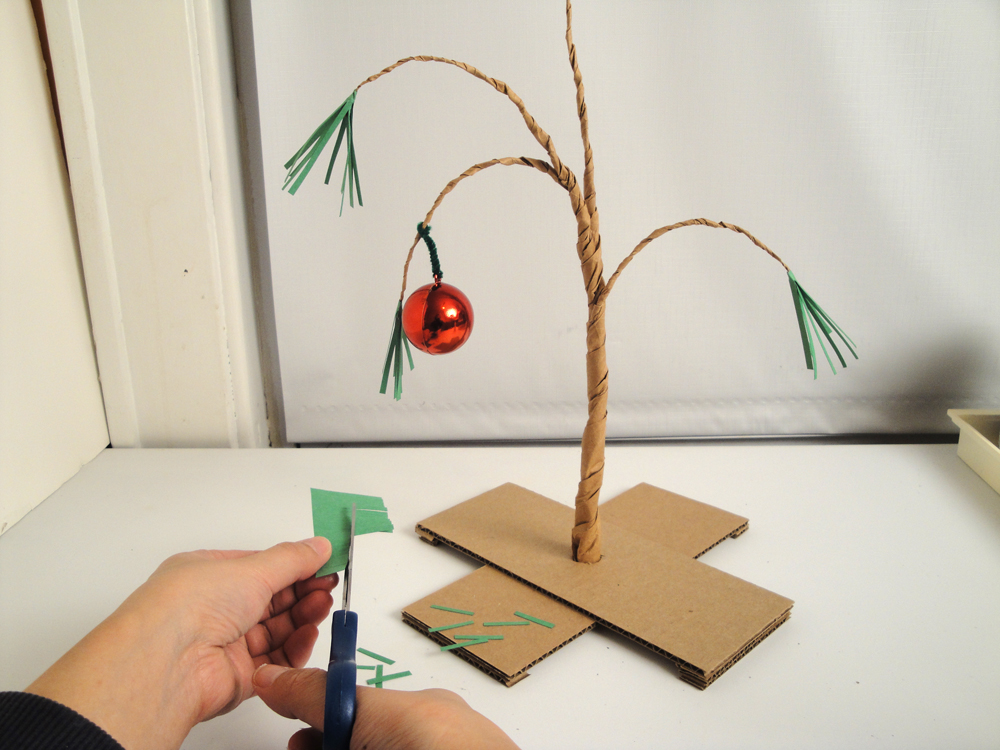 14. Cut and spread some pine needles around the tree. |
 RSS Feed
